Java IO Tutorial - Java Buffer Read Write
Buffer Read
There are two ways to read data from a buffer:
- absolute position
- relative position
The get() method overloaded with four versions is used to read data from a buffer.
get(int index) returns the data at the given index.
get() returns the data from the current position in the buffer and increases the position by 1.
get(byte[] destination, int offset, int length) reads data from a buffer in bulk. It reads length number of bytes from the current position of the buffer and puts them in the specified destination array starting at the specified offset.
get(byte[] destination) fills the specified destination array by reading data from the current position of the buffer and incrementing the current position by one each time it reads a data element.
Buffer Write
The put() method overloaded with five versions is used to write data to a buffer.
put(int index, byte b) writes the specified b data at the specified index. The call to this method does not change the current position of the buffer.
put(byte b) writes the specified byte at the current position of the buffer and increments the position by 1.
put(byte[] source, int offset, int length) writes the length number of bytes from the source array starting at offset to the buffer starting at the current position. It throws a BufferOverflowException if there is not enough room in the buffer to write all bytes. The position of the buffer is incremented by length.
put(byte[] source) is the same as calling put(byte[] source, 0, source.length).
ByteBuffer put(ByteBuffer src) reads the remaining bytes from the specified byte buffer src and writes them to the buffer. If the remaining space in the target buffer is less than the remaining bytes in the source buffer, a runtime BufferOverflowException is thrown.
The following code shows how to do Writing to and Reading from a Buffer.
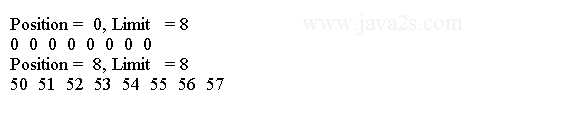
import java.nio.ByteBuffer;
//from   w  w  w. j  av  a2  s.  c  o  m
public class Main {
  public static void main(String[] args) {
    ByteBuffer bb = ByteBuffer.allocate(8);
    printBufferInfo(bb);
    for (int i = 50; i < 58; i++) {
      bb.put((byte) i);
    }
    printBufferInfo(bb);
  }

  public static void printBufferInfo(ByteBuffer bb) {
    int limit = bb.limit();
    System.out.println("Position =  " + bb.position() + ", Limit   = " + limit);
    for (int i = 0; i < limit; i++) {
      System.out.print(bb.get(i) + "  ");
    }
    System.out.println();
  }
}
The hasRemaining() method of a buffer returns true if we can use relative get() or put() method on the buffer to read/write at least one element.
We can get the maximum number of elements we can read/write using relative get() or put() methods by using its remaining() method.
The code above generates the following result.
Example
The following code shows how to use the flip() and hasRemaining() Methods of a Buffer Between Relative Reads and Writes.
import java.nio.ByteBuffer;
/* www  . java 2s . c  o m*/
public class Main {
  public static void main(String[] args) {
    ByteBuffer bb = ByteBuffer.allocate(8);
    printBufferInfo(bb);

    // Use flip() to reset the position to zero because
    // the printBufferInfo() method uses relative get() method
    bb.flip();

    int i = 50;
    while (bb.hasRemaining()) {
      bb.put((byte) i++);
    }

    // Call flip() again to reset the position to zero,
    // because the above put() call incremented the position
    bb.flip();
    printBufferInfo(bb);
  }

  public static void printBufferInfo(ByteBuffer bb) {
    int limit = bb.limit();
    System.out.println("Position =  " + bb.position() + ", Limit   = " + limit);
    while (bb.hasRemaining()) {
      System.out.print(bb.get() + "  ");
    }
    System.out.println();
  }
}
The code above generates the following result.

Read-Only Buffers
A buffer can be read-only or read-write. We can only read the contents of a read-only buffer.
We can get a read-only buffer by calling the asReadOnlyBuffer() method of the specific buffer class.
// Create a  buffer that is read-write by  default
ByteBuffer bb  = ByteBuffer.allocate(1024);
boolean readOnly   = bb.isReadOnly(); // false
To check if a buffer is read-only, call the isReadOnly() method as follows:
ByteBuffer bbReadOnly = bb.asReadOnlyBuffer();
boolean readOnly = bbReadOnly.isReadOnly();
The read-only buffer returned by the asReadOnlyBuffer() method is a different view of the same buffer. Any modifications to the contents of the original buffer are reflected in the read-only buffer.
Buffer View
We can obtain different views of a buffer. A view of a buffer shares data with the original buffer and maintains its own position, mark, and limit.
We can also duplicate a buffer, in which case they share contents, but maintain mark, position, and limit independently. Use the duplicate() method of a buffer to get a copy of the buffer as follows:
// Create a  buffer
ByteBuffer bb  = ByteBuffer.allocate(1024);

// Create a  duplicate view  of  the   buffer
ByteBuffer bbDuplicate = bb.duplicate();
We can also create a sliced view of a buffer by using the slice() method of a buffer to create its sliced view as follows:
// Create a  buffer
ByteBuffer bb  = ByteBuffer.allocate(8);
bb.position(3);
bb.limit(6);
// bbSlice will have  position set to 0  and  its  limit set to 3.
ByteBuffer bbSlice  = bb.slice();
We can also get a view of a byte buffer for different primitive data types.
For example, we can get a character view, a float view, etc. of a byte buffer. The ByteBuffer class contains methods such as asCharBuffer(), asLongBuffer(), asFloatBuffer(), etc. to obtain a view for primitive data types.
// Create a  byte   buffer
ByteBuffer bb  = ByteBuffer.allocate(8);

// Create a  char   view  of  the   byte   buffer
CharBuffer cb  = bb.asCharBuffer();

// Create a  float view  of  the   byte   buffer
FloatBuffer fb  = bb.asFloatBuffer();