Android UI How to - Create nested LinearLayout
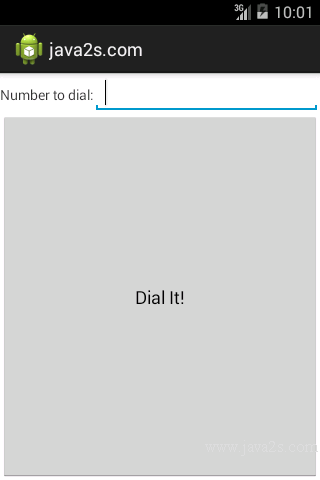
The following example shows how to Create nested LinearLayout.
Example
<?xml version="1.0" encoding="utf-8"?>
<LinearLayout xmlns:android="http://schemas.android.com/apk/res/android"
    android:orientation="vertical"
    android:layout_width="fill_parent"
    android:layout_height="fill_parent"
    >
  <LinearLayout
    android:orientation="horizontal"
    android:layout_width="fill_parent"
    android:layout_height="wrap_content"
    >
    <TextView
      android:layout_width="wrap_content"
      android:layout_height="wrap_content"
      android:text="Number to dial:"
      />
    <EditText android:id="@+id/number"
      android:layout_width="fill_parent"
      android:layout_height="wrap_content"
      android:cursorVisible="true"
      android:editable="true"
      android:singleLine="true"
    />
  </LinearLayout>
  <Button android:id="@+id/dial"
    android:layout_width="fill_parent"
    android:layout_height="wrap_content"
    android:layout_weight="1"
    android:text="Dial It!"
  />
</LinearLayout>
Java code
import android.app.Activity;
import android.content.Intent;
import android.net.Uri;
import android.os.Bundle;
import android.view.View;
import android.widget.Button;
import android.widget.EditText;
/*from   w  w  w  . ja  v  a  2 s .  c  o  m*/
public class MainActivity extends Activity {
  @Override
  public void onCreate(Bundle icicle) {
    super.onCreate(icicle);
    setContentView(R.layout.main);

    final EditText number=(EditText)findViewById(R.id.number);
    Button dial=(Button)findViewById(R.id.dial);

    dial.setOnClickListener(new Button.OnClickListener() {
      public void onClick(View v) {
        String toDial="tel:"+number.getText().toString();

        startActivity(new Intent(Intent.ACTION_DIAL,
                                  Uri.parse(toDial)));
      }
    });
  }
}
