Organize and View Names: Edit, Delete : Cells Name « Formula « Microsoft Office Excel 2007 Tutorial


| 6.4.Cells Name | ||||
| 6.4.1. | Name a Cell or Range Using the Name Box | |||
| 6.4.2. | Let Excel Name a Cell or Range | |||
| 6.4.3. | Name a Cell or Range Using the New Name Dialog Box | |||
| 6.4.4. | Enter a Named Cell or Range Using the Name Box | |||
| 6.4.5. | Enter a Named Cell or Range Using Formula AutoComplete | |||
| 6.4.6. | Enter a Named Cell or Range from the Use in Formula Command | |||
| 6.4.7. | Apply a Name to a Cell or Range Address | |||
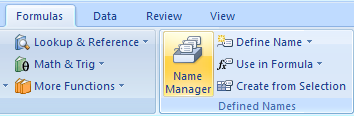
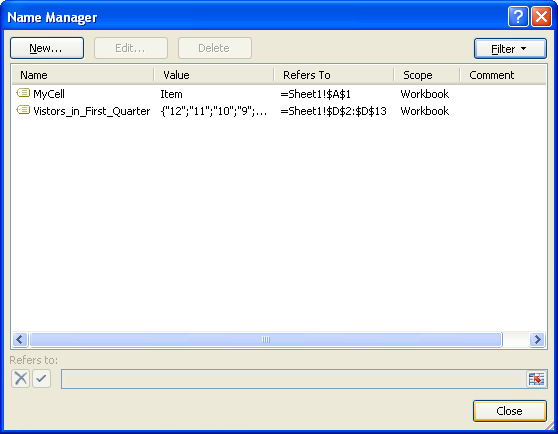
| 6.4.8. | Organize and View Names: Edit, Delete | |||
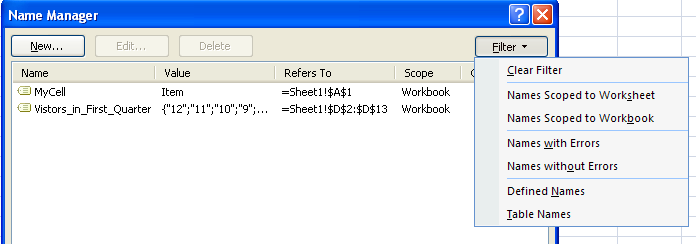
| 6.4.9. | Name Manager Filter Options | |||
| 6.4.10. | Change a Name | |||
| 6.4.11. | Delete a name range | |||