Create Envelopes : Label Envelopes « Mail Merge « Microsoft Office Word 2007 Tutorial
| 9.5.Label Envelopes | ||||
| 9.5.1. | Create Labels Using Mail Merge | |||
| 9.5.2. | Set up the main document for labels manually | |||
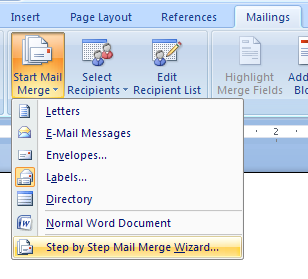
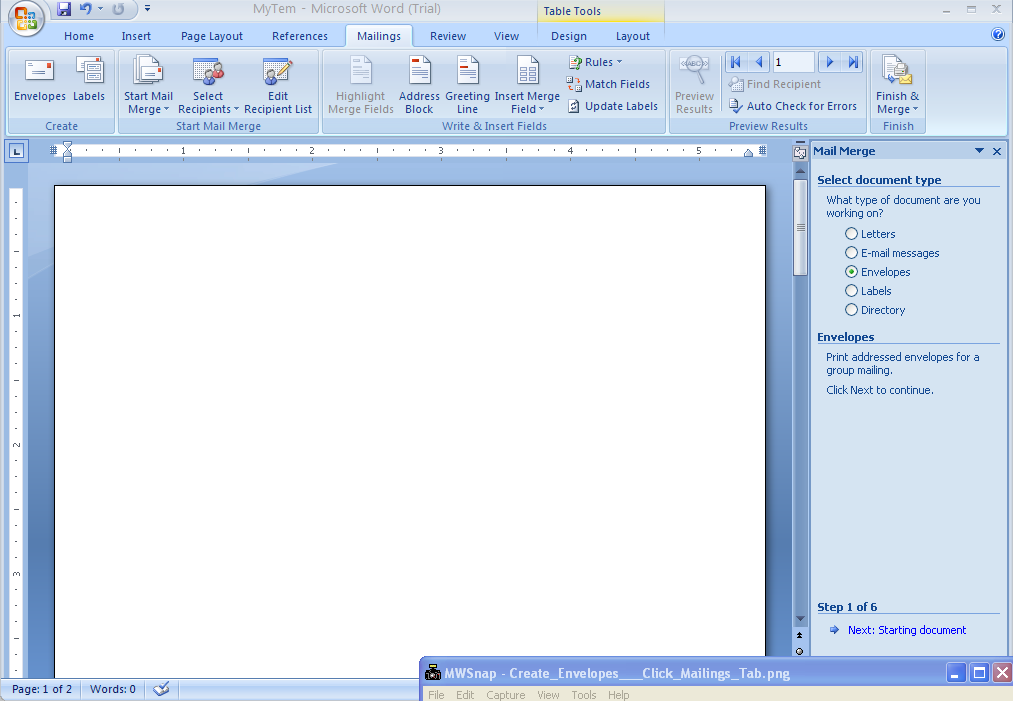
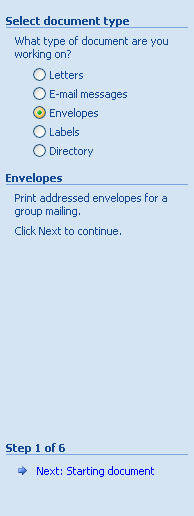
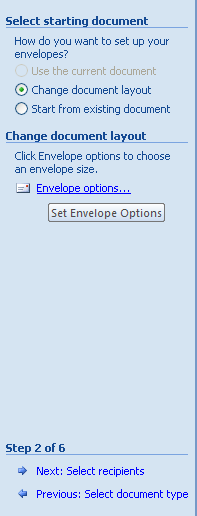
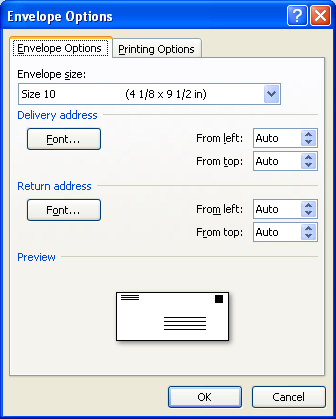
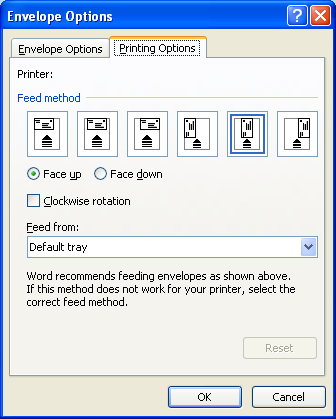
| 9.5.3. | Create Envelopes | |||
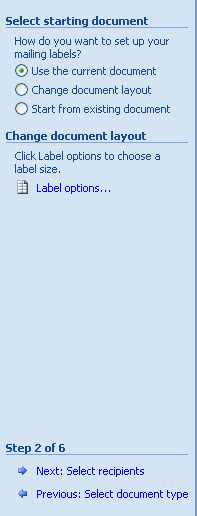
| 9.5.4. | Set up the main document for envelopes manually | |||